
Follow along in this tutorial and learn how to create a sports-themed poster with animation for a fictional college football team – the Knox City State Cougars!
There is lots to cover in this lesson, including going over how to remove a background from the main image using Adobe Photoshop as well as adding effects, gradient feathers and working with blending modes in Adobe InDesign.
As always, you can find the assets for this tutorial available for download here.
Also, for this tutorial, I am using a combination of Rift and Museo Slab – two amazing Adobe fonts. However you can pair a nice condensed sans serif and slab serif font that you may think will work as well.
Let's start by removing the background from the image in Photoshop. For this part, we'll be using the Quick Selection Tool to create a Clipping Mask and remove the background. Launch Photoshop and open the image called Football_Player.JPG, which you can find in your download folder.
Removing Background from Image
In the Tools Panel, choose the Quick Selection Tool. (Note: It shares the same flyout as the Magic Want Tool, so you may have to click and hold the tool to access the Quick Selection)
Before making your selection, create a copy of the image layer just to have the original intact. This can be done by going to the Layers Panel, right clicking the Background Layer and clicking Duplicate Layer. Turn off the Background Layer.
Working on the Background Copy and with the Quick Selection Tool activated, click the Select Subject button in the Control Panel at the top. This will launch Adobe Sensei to create a selection of the subject.
Next, click the Select and Mask button, also in the Control Panel at the top. This allows you to make any further adjustments to refine the selection. (Watch the video tutorial as I go over tips on using the Refine Brush Tool for Hair and the Brush Tool to refine areas of the subject that Adobe Sensei may have missed).
Once you are satisfied with the selection, click OK to exit the Select and Mask window.
Open the Layers Panel and click the Create Layer Mask Icon – the square icon with the circle (shown in slide below).
Save the .PSD file as Football_Player.PSD.
Here's a visual slide of the steps explained above:


Great! That is the only step where Photoshop will be needed. However, if you need to edit the PSD, you can always open it again in Ps, make your changes, save it and then update the link when it's in the InDesign layout.
Let's move to InDesign now and set up the document for the interactive poster.
Setting Up InDesign Document
Click New File or simply go to File > New > Document
Choose the Web tab and set the Width to 792 px and the Height to 1224 px. This is an 11 x 17 poster size converted to pixel size.
Set the Pages to 1
Set the Margins to 36 px
Click Create
In this design, there are two types of effects we'll apply to the background number 32 in the athlete poster: Gradient Feather to fade the number into the background as well as Bevel and Emboss to add some depth and dimension to the number.
Before we go any further, it's a good idea to create the text frame into Outlines. Be sure to make a copy of this beforehand so you can reference the original if need be.
To create to outlines, click the text frame once with your Selection Tool, go to Type and choose Create Outlines. A shortcut for this is Shift + Command (Mac) or Shift + Ctrl (Windows) and O.
Gradient Feather & Bevel and Emboss Effects
Open the Effects Panel by going to Window > Effects. This panel is built into the Properties Panel as well, if you'd like to work from there.
Click on the 32 text frame once and in the Effects Panel click the Fx icon in the bottom right.
Choose Gradient Feather
In this Effects adjustment window, be sure to click Preview to see the changes in real time.
Make sure the Type is set to Linear and set the Angle to -90° so the fade is at the bottom of the number.
In the Gradient Stops adjustment slider, move the mid-slider to 45% or your preference.
To add a secondary Effect, click on the Bevel and Emboss selection on the left side.
Under the Shading section, set the Angle to 100°
Click OK
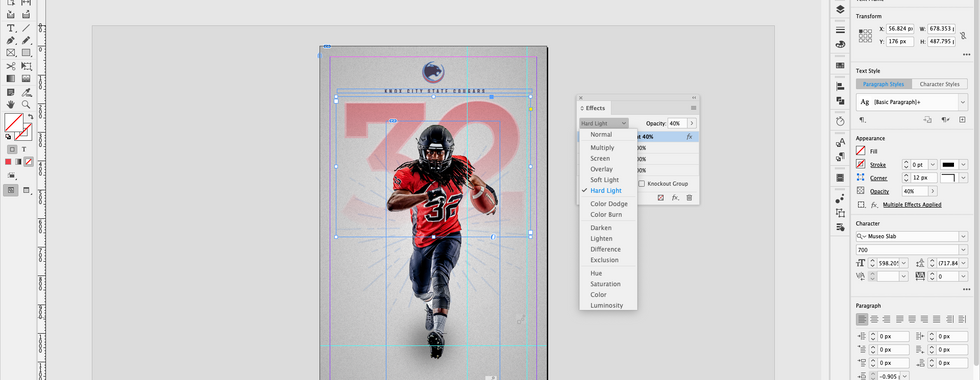
As a last step, change the opacity of the number to 40% and the blend mode to Hard Light, which will brighten the highlights to the number 32.
Here's a visual slide of the steps explained above:


Follow along in the video tutorial as I go over how to add a textured background and animation/interactivity to the content in the layout.
Comments